How to Wear a Bike Helmet Properly: A Complete Fit Guide
Last Updated On: July 26, 2026
A lot of riders buy a good helmet, then undo all that protection by wearing it too far back, leaving the straps loose, or never adjusting it after the first ride.
Here is the truth: a helmet only works if it sits where it is supposed to sit. A helmet that is tilted back, too loose, or sized wrong will not protect your head the way it should if you fall. The good news is that fitting one correctly takes a few minutes, and once you know what to look for, you will check it out of habit every time you ride.
This guide walks through everything from picking the right size to the exact adjustments that keep a helmet secure, plus the mistakes we see most often on the road and trail.
Why Proper Fit Actually Matters
A helmet is built to absorb impact and slow down the force that would otherwise hit your skull directly. That only happens if the helmet is positioned correctly at the moment of a fall. Push it back on your head, leave the straps flapping, or wear one that is too big, and you have created gaps where your head has little to no protection at all.
The League of American Bicyclists puts it plainly: wearing a bike helmet improperly is essentially the same as not wearing one at all. That is not meant to scare anyone off cycling. It is simply a reminder that fit is not a minor detail. It is the entire point of wearing the helmet in the first place.
Step 1: Choose the Right Size Before You Worry About Fit
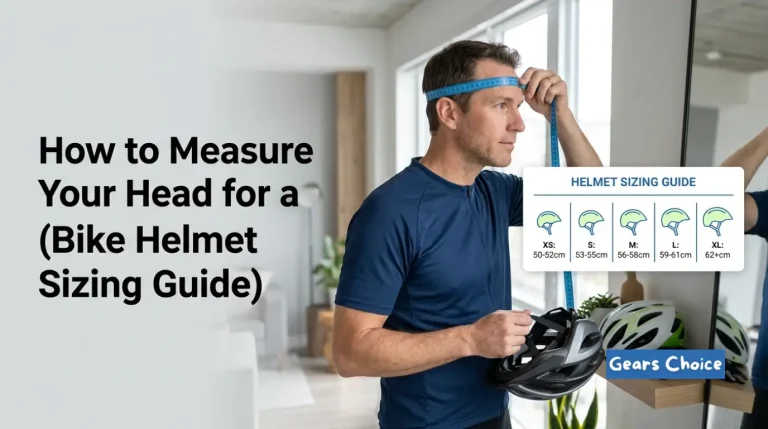
You cannot fit a helmet correctly if it is the wrong size to begin with. Every helmet brand sizes differently, so always check the manufacturer’s size chart rather than guessing based on a helmet you already own.
To find your size, wrap a flexible tape measure around the widest part of your head, roughly an inch above your eyebrows and just above your ears. That measurement in centimeters is what you match against the brand’s sizing guide. If you are between two sizes, most riders find the smaller size fits more securely once the internal padding compresses slightly with use.
We cover this in more depth, including exactly where to measure and how to read different brand size charts, in our guide on how to measure helmet size. If you already own a helmet and are not sure whether it is sized correctly for you, our article on signs a helmet is too small walks through the fit test in detail, even though that guide is written with motorcycle helmets in mind, the same warning signs of a too tight or too loose fit apply here.
Step 2: Pick a Helmet Style That Matches How You Ride
Fit and comfort also depend on choosing a helmet built for your riding style. A commuter helmet, a mountain biking helmet, and a road racing helmet all distribute coverage differently. Mountain bike helmets typically extend further down the back of the head, since falls in that discipline are more likely to happen backward. Road helmets tend to be lighter and better ventilated for long rides at higher intensity.
None of that changes the fitting steps below, but it does mean two riders wearing the “same size” helmet from different categories may feel a slightly different fit once it is on. Try a helmet on before committing to it whenever you can, since head shapes vary as much as helmet designs do.
How to Properly Put On a Bike Helmet, Step by Step
Once you have the right size, here is the process for putting it on correctly every time.
- Loosen everything first. Open the rear dial or ratchet all the way, and loosen the chin strap so the helmet slides on easily without you having to force it.
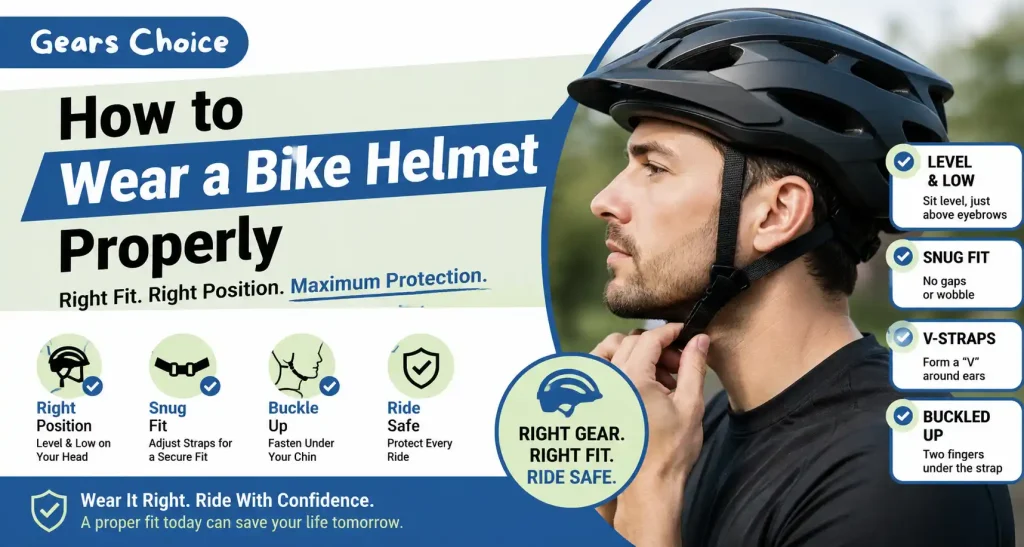
- Set it level on your head. The helmet should sit flat, not tipped back like a hat. The front edge should rest low on your forehead, roughly one to two finger widths above your eyebrows.
- Tighten the rear dial or straps. Turn the ratchet or pull the internal strap until the helmet feels snug around the full circumference of your head, with only slight, controlled movement when you shake your head side to side.
- Adjust the side straps into a V shape. The straps on each side should meet just below and slightly in front of your ears, forming a clean V rather than crossing behind the earlobe.
- Buckle and tighten the chin strap. Fasten the strap under your chin and tighten it until you can fit only one or two fingers comfortably between the strap and your chin. Open your mouth wide. You should feel the helmet press down slightly on the top of your head. If it does not move at all, tighten the strap a bit more.
That is really the whole process. Once the straps are dialed in, most riders do not need to readjust them again unless they switch hats, hairstyles, or helmets.
The Two Finger Rule (And Why It Works So Well)
Almost every cycling safety organization, from national transportation agencies to bike shops, teaches some version of the same rule for checking fit: two fingers above your eyebrows, two fingers forming a V below each ear, and roughly one to two fingers of space under a fastened chin strap.
The NHTSA’s official helmet fitting guide uses this exact measurement as the standard for checking whether a helmet is positioned correctly, and Portland’s Bureau of Transportation recommends the same check for both kids and adults. It is a simple, repeatable way to confirm your bike helmet on head is sitting exactly where it needs to be, without needing any tools beyond your own hand.
Adjusting Straps So They Actually Stay Put
A helmet that fits well when you first put it on can still shift during a ride if the straps are not dialed in properly. According to REI’s helmet fitting advice, the test is simple: with the chin strap buckled, open your mouth wide. You should feel the helmet pull down slightly against the top of your head. If nothing happens, the strap is too loose and needs tightening.
Cycling UK also recommends checking the fit before every ride by shaking your head side to side and bending forward with the chin strap undone. If the helmet shifts or threatens to fall off in either test, the rear dial needs another turn before you head out.
Common Mistakes That Ruin an Otherwise Good Fit
Even expensive, well built helmets fail to protect properly when they are worn incorrectly. Here are the mistakes we see most often.
- Wearing the helmet too far back. This is the most common mistake on the road. It looks casual, but it leaves your forehead completely exposed in exactly the area most likely to hit the ground first in a forward fall.
- Buying a helmet that does not actually fit. A helmet that is too small will not sit down properly no matter how you adjust the straps. One that is too big will rock from side to side and can slide down over your eyes.
- Wearing a thick hat or beanie underneath. On cold days it is tempting to layer up, but a thick hat raises the helmet off your head and breaks the fit entirely. A thin liner or ear band is a much safer choice in cold weather.
- Leaving the straps loose or unbuckled. A helmet with a dangling, unfastened strap offers close to no protection at all in a crash, since nothing is holding it in place on impact.
- Wearing it backward. It happens more often than people expect. Most helmets have the ratchet or dial positioned at the back for a reason, and wearing it front to back throws off the entire fit and coverage.
What About Hair and Hairstyles?
Thick hair, buns, and ponytails can all get in the way of a proper fit, especially with helmets that have a rear adjustment dial. If your hairstyle is pushing the helmet forward or preventing the rear strap from sitting flat against your head, it is worth adjusting your style before a ride rather than fighting the helmet’s fit afterward. We put together a full guide on managing your hair while wearing a helmet if this is a recurring issue for you.
Do Modern Safety Features Change How You Fit a Helmet?
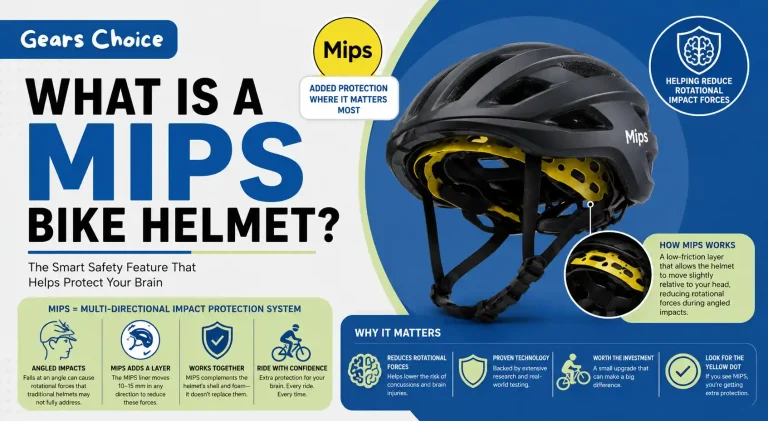
Not really, but it helps to understand what you are adjusting. Many current helmets include rotational impact protection systems, often referred to under brand names like MIPS, built into the inner liner.
These systems work best when the helmet is already fitted correctly, since they rely on the outer shell and liner moving in a very specific way during an impact. If you are shopping for a new helmet, our breakdown of what MIPS actually does explains the technology in plain terms.
Final Thoughts
Wearing a helmet is only half the job. Knowing how to properly wear a bike helmet, meaning the right size, level positioning, snug straps, and a quick check before every ride, is what actually keeps it doing its job when you need it most.
Run through the two finger rule, buckle the chin strap properly, and make it a habit rather than an afterthought. For more helmet buying guides, fit advice, and gear reviews, visit Gears Choice.
Frequently Asked Questions About Fitting a Bike Helmet
How do I know if my bike helmet fits correctly?
Check three things: it sits level with the front edge one to two finger widths above your eyebrows, it barely moves when you shake your head with the straps undone, and the side straps meet in a clean V just below each ear.
Can I wear a hat under my bike helmet?
A thin liner, cycling cap, or ear band is fine. A thick winter hat usually raises the helmet too high and breaks the fit, so skip it and layer with thinner materials instead.
Why does my helmet feel loose after a while?
Straps and padding can loosen slightly with wear and sweat over time. Check the fit periodically and retighten the rear dial or chin strap as needed, especially at the start of a new season.
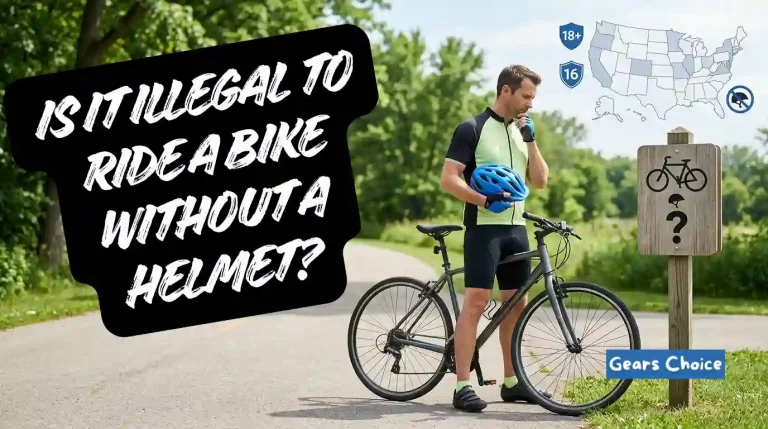
Is it illegal to ride a bike without a helmet?
Helmet laws vary by location and often depend on the rider’s age. We cover the details by region in our article on whether it is illegal to ride without a helmet.
How often should I replace my bike helmet?
Most manufacturers recommend replacing a helmet every three to five years even without a crash, since materials break down from sun exposure, heat, and general wear. Replace it immediately after any impact, even if there is no visible damage.

Hi, I’m James Dean. My motorbike obsession started at age seven with a 50cc bike, and I’ve been riding ever since. From motocross in my teens to cruising and snowmobiling today, I’ve got over 15 years of experience. As a mechanical engineer and passionate rider, I founded gearschoice.com to share my insights and help you find the best motorcycle gear.